
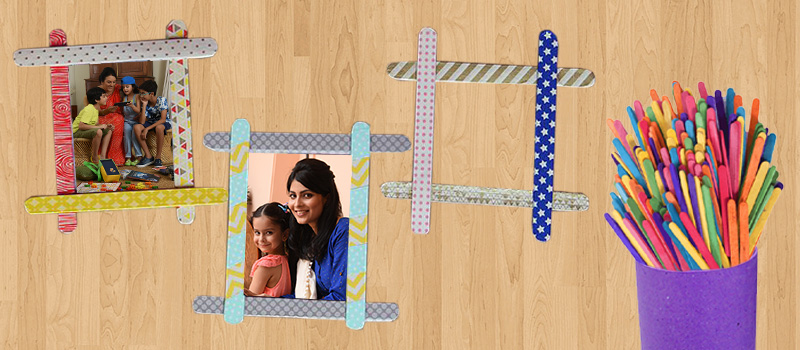
How to make Ice Cream Stick Photo frame
Did your child again long for an ice cream on the road? No problem! Go ahead and let him/her enjoy his favourite ice cream bar and don’t forget to grab the ice cream sticks. You can now engage your kid in a simple activity and help him/her create something beautiful with these sticks. A little recreation can do wonders to your child’s attention. Results can be pleasing and highly encouraging. So let’s start with this interesting ‘best out of waste activity’ to keep your child engaged during the leisure hours.
Things you need -
- Ice cream sticks
- Sketch pens/watercolor
- Glue
- Scissors
- A photograph to cherish
How to make an Ice- Cream Stick Photo Frame
Step 1
Hand over a few ice cream sticks and sketch pens or watercolor to your child and tell him /her to draw/colour the sticks in any form or pattern. Help your kid by showing examples and share the joy of colouring with your kid.
Step 2
Once the sticks are ready, join the sticks from the edges with the help of glue in order to create a square frame. This way the child can also get a hang on shapes practically.
Step 3
Once the frame is ready, get a photograph and cut it in the required square shape. Also, help your kid to measure and cut the photograph.
Note: Guide your child while using the scissors to avoid injuries.
Step 4
Paste the frame on the photograph keeping in mind that the glue is only used on the required area of the frame.
Hurray! A mini photo frame is ready!
These steps can be repeated to create various frames. you can then pin them on any board in the house. Completing the crafts successfully will give your child a great sense of accomplishment and pride.
Keep crafting happiness with your child!
Related Resources

Daily Newspaper

Everyday Happiness